Chrome开机自启动
使用 systemd 创建服务
创建一个新的服务文件,输入命令 sudo nano /etc/systemd/system/google-chrome.service
在文件中输入以下内容:
1 | [Unit] |
保存并退出编辑器,终端输入以下命令启用并启动服务:
1 | sudo systemctl daemon-reload |
创建桌面启动文件
这种方法适合需要自定义启动参数的场景:
- 打开终端,运行以下命令创建启动文件:
1 | mkdir -p ~/.config/autostart |
- 在文件中输入以下内容:
1 | [Desktop Entry] |
--start-maximized:启动时最大化窗口。--kiosk:全屏模式。"http://www.example.com":替换为你希望打开的网页地址。
Ubuntu AMD的CPU安装
执行下面的步骤,在你的 Ubuntu 系统上安装 Chrome 浏览器:
1.1 下载 Google Chrome
使用Ctrl+Alt+T快捷键或者点击终端图标,打开你的终端。
使用wget来下载 Google Chrome .deb 软件包:
1 | wget https://dl.google.com/linux/direct/google-chrome-stable_current_amd64.deb |
1.2 安装 Google Chrome
在 Ubuntu 系统上安装软件包需要管理员权限。以 sudo 用户身份在你的系统上运行下面的命令来安装 Chrome .deb软件包:
1 | sudo apt install ./google-chrome-stable_current_amd64.deb |
在被提示时,输入你的密码,安装将会开始。
此时,你已经在你的 Ubuntu 系统上安装好了 Chrome。
Ubuntu ARM的CPU安装
chrome安装(root安装)
1
sudo snap install chromium
浏览器字体安装
1
2
3
4
5
6
7
8
9
10
11
12
13
14
15
16sudo apt update && sudo apt upgrade -y
sudo apt install language-pack-zh-hans -y
sudo apt update && sudo apt upgrade -y
sudo apt install language-pack-zh-hans -y
sudo apt install fonts-wqy-zenhei fonts-wqy-microhei fonts-noto-cjk -y
sudo apt install fonts-wqy-zenhei fonts-wqy-microhei -y -y
sudo apt install fonts-wqy-zenhei fonts-wqy-microhei fonts-noto-cjk fonts-arphic-ukai fonts-arphic-uming fonts-droid-fallback -y
sudo locale-gen zh_CN.UTF-8   # 生成中文 locale
sudo update-locale LANG=zh_CN.UTF-8  # 设置系统默认语言
export LANG=zh_CN.UTF-8
sudo apt install fonts-wqy-zenhei fonts-wqy-microhei fonts-noto-cjk -y
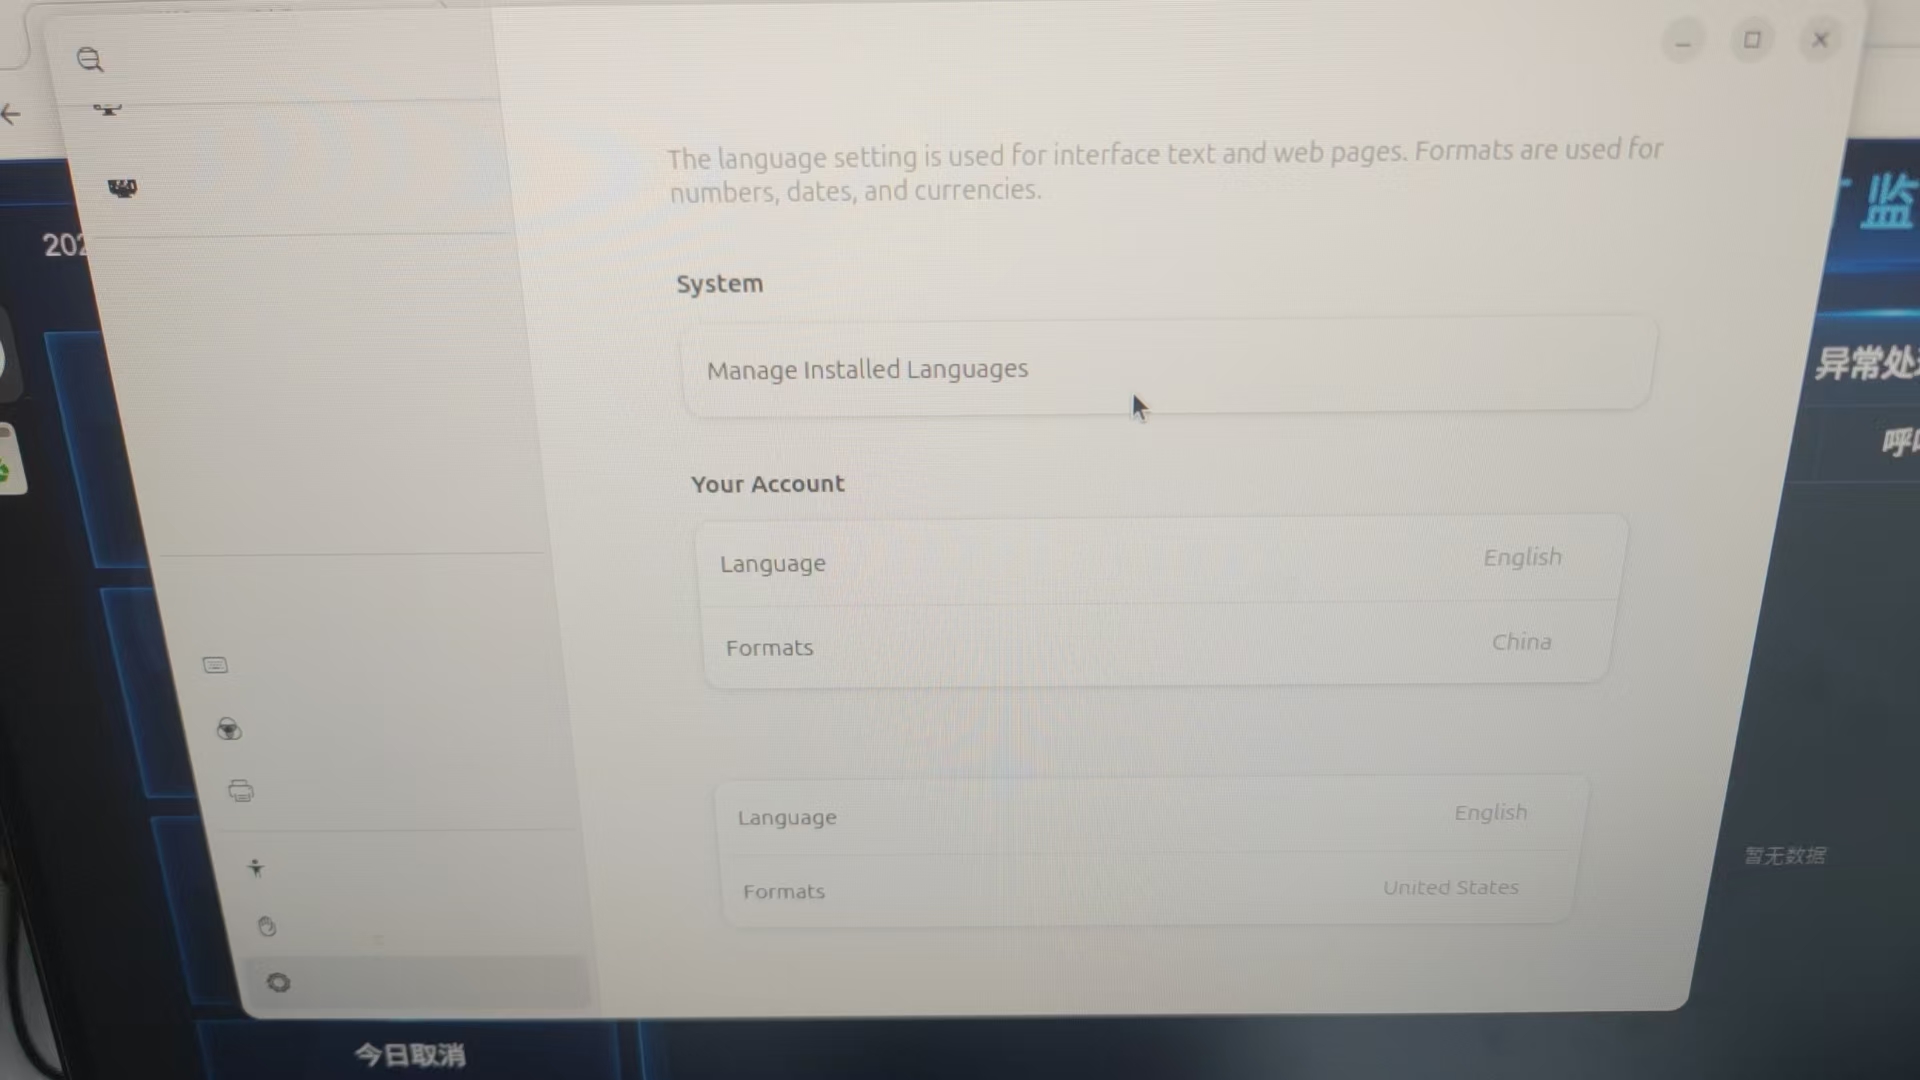
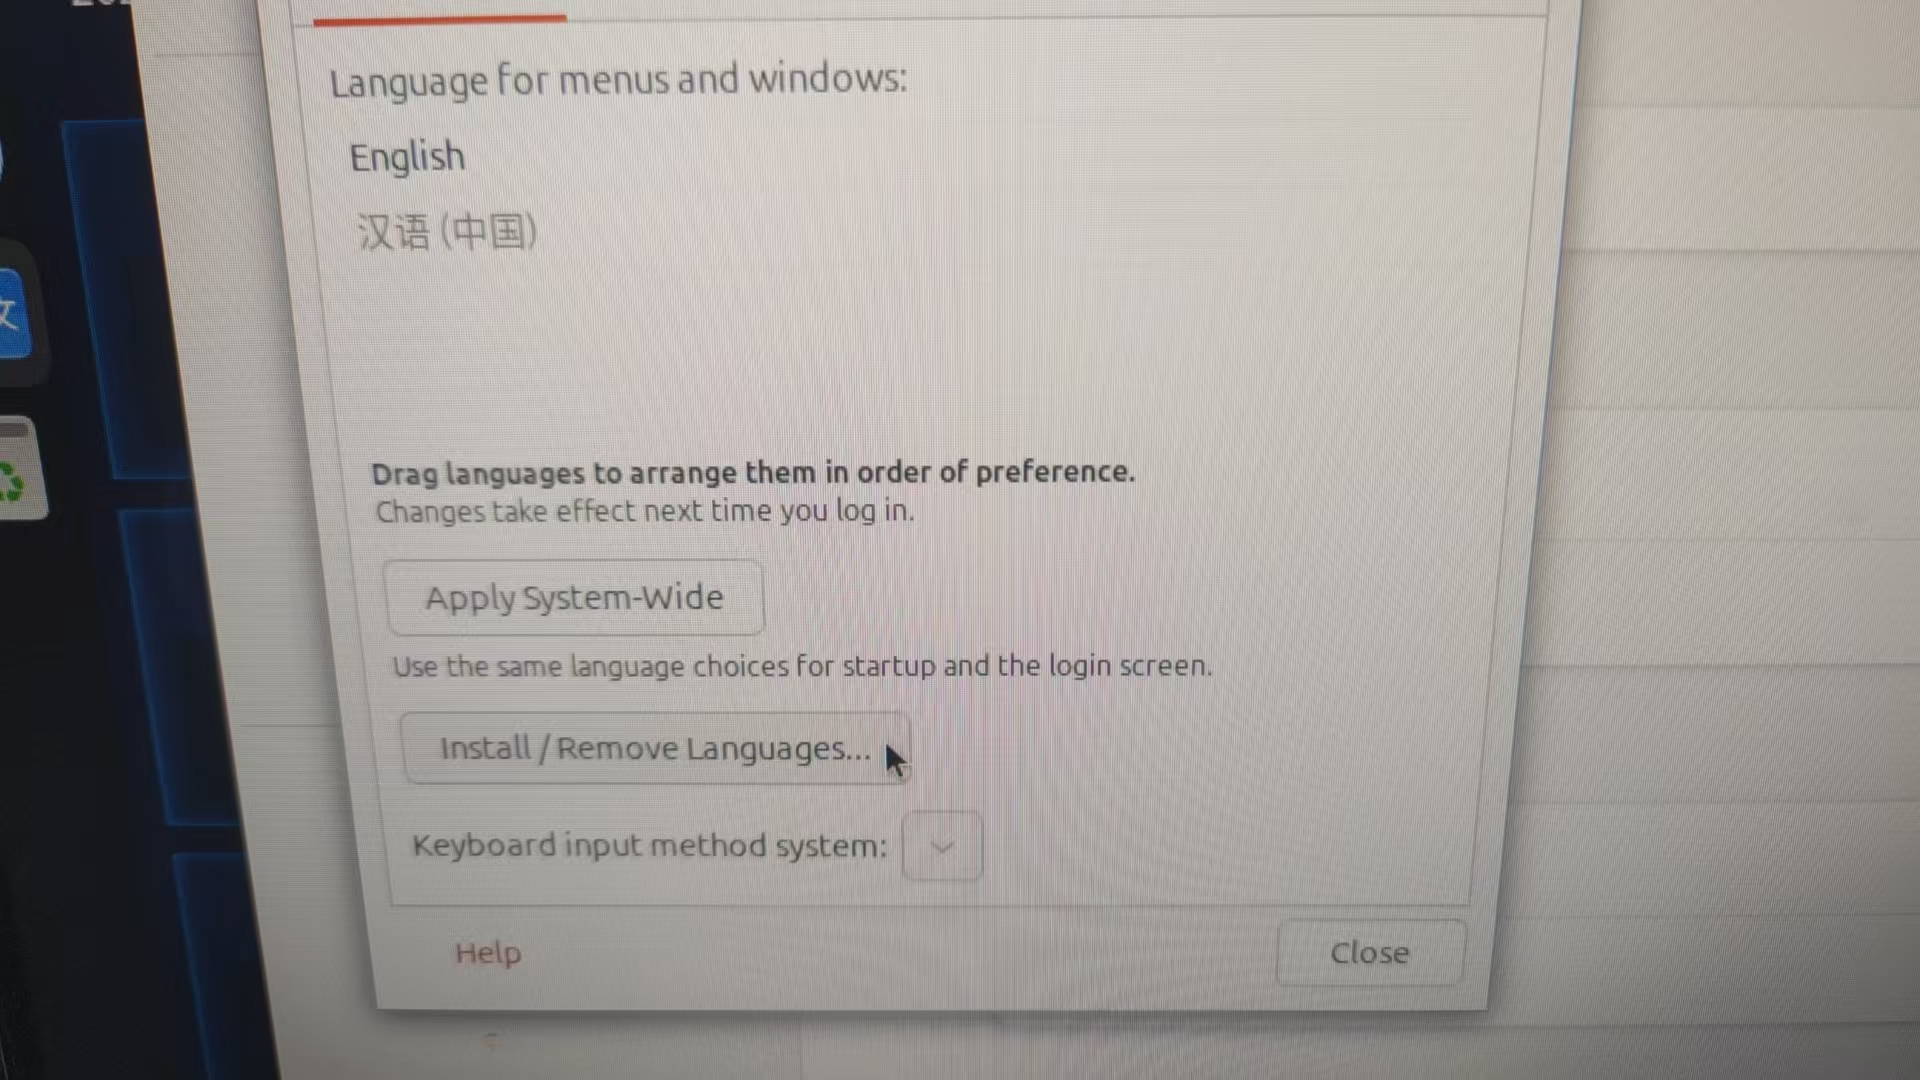
环境变量设置
Ubuntu默认的中文字符编码为zh_CN.UTF-8
输入命令:sudo vim /etcenvironment
修改内容如下:
1 | PATH="/usr/local/sbin:/usr/local/bin:/usr/sbin:/usr/bin:/sbin:/bin:/usr/games" |
设置环境变量
1 | sudo locale-gen zh_CN.UTF-8 # 生成中文 locale |
Ubuntu系统配置中文显示